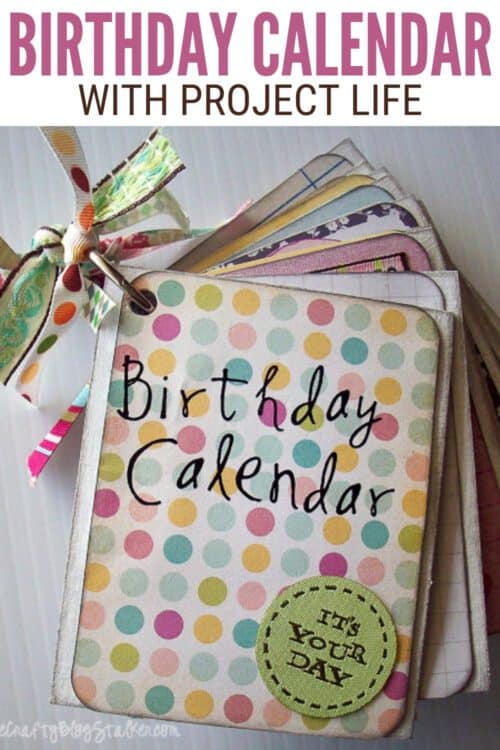
Use a Project Life Kit to create a Birthday Month Calendar Mini Book. A complete step-by-step tutorial!
I am a list maker - If I don't write something down I usually forget.
One thing I am really bad at is remembering birthdays. The only birthdays I have memorized are my kids, parents, and siblings.
Mt poor nieces, nephews, cousins, and friends. I have no idea when their birthdays are.
So I thought making a Birthday Calendar Mini book would help me - plus it is super cute!
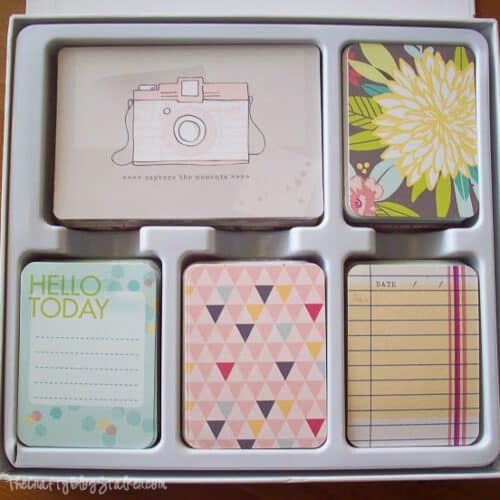
Supplies You'll Need to Create this Project:
Links may go to similar items when exact items couldn't be found online. Help me continue to provide free tutorials by shopping my affiliate links. Please review our Privacy Policy.
- Project Life Kit
- Chipboard
- Black Ink pad
- White Paint
- Foam Paint Brush
- Tacky Tape Adhesive
- Rub-on Letters
- Ribbon
- Metal Ring
- Hole Punch
Mini Book Tutorial:
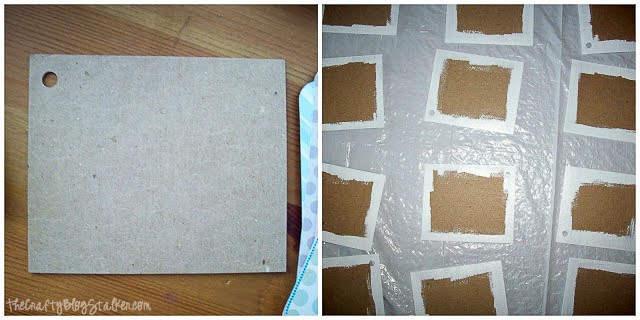
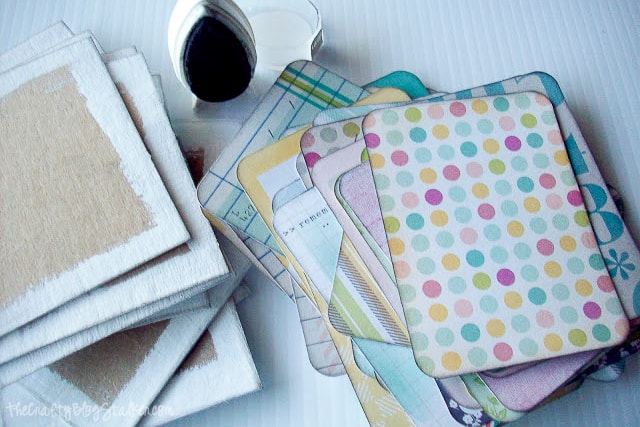
Cut the pieces of chipboard into 13, 4 x 3 ½ inches rectangles.
Punch a hole in the upper left corner of each chipboard piece. Making sure that the hole is in the same spot on each piece so they line up.
Paint the edges white and let dry.
Look through the Project Life Kit and choose 26 of the small papers.
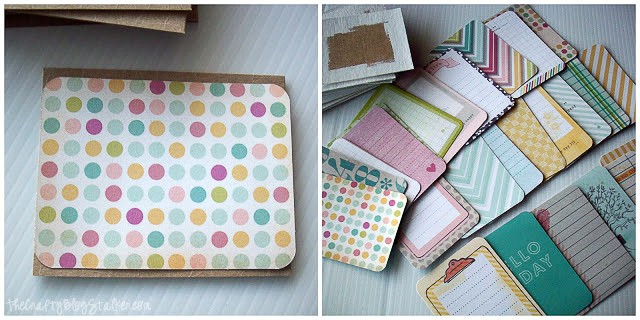
Ink the edges of the paper if you would like. This adds dimension but is completely optional.
Adhere the first paper on the first chipboard piece.
Before you tape the second paper on the back be sure to use the hole punch to punch a hole in the paper.
Now put your back piece on and punch your hole again.
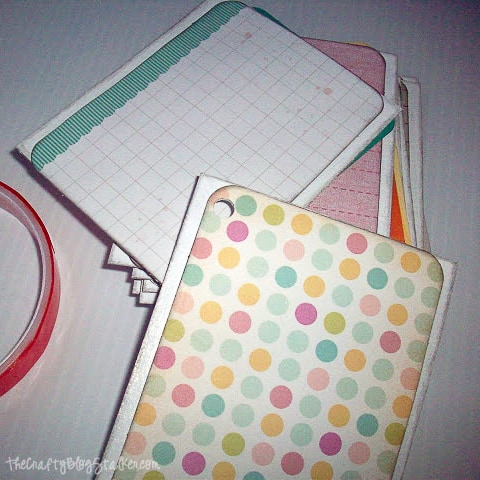
Repeat until all of the papers are on your chipboard.
Place all of the pages on the metal ring.
Using the rub-on letters, add the title and months to the pages.
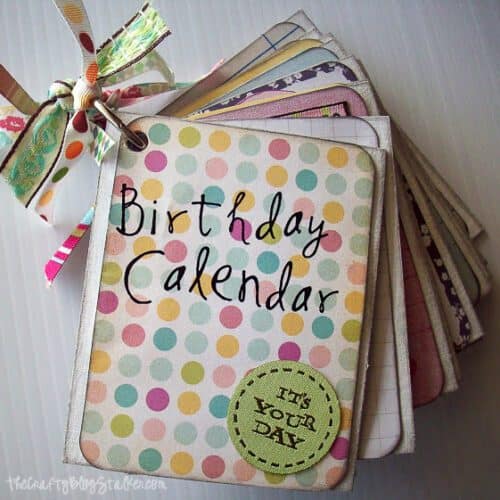
Tie some ribbon to the ring to finish off the Birthday Book.
Here are all of my pages.
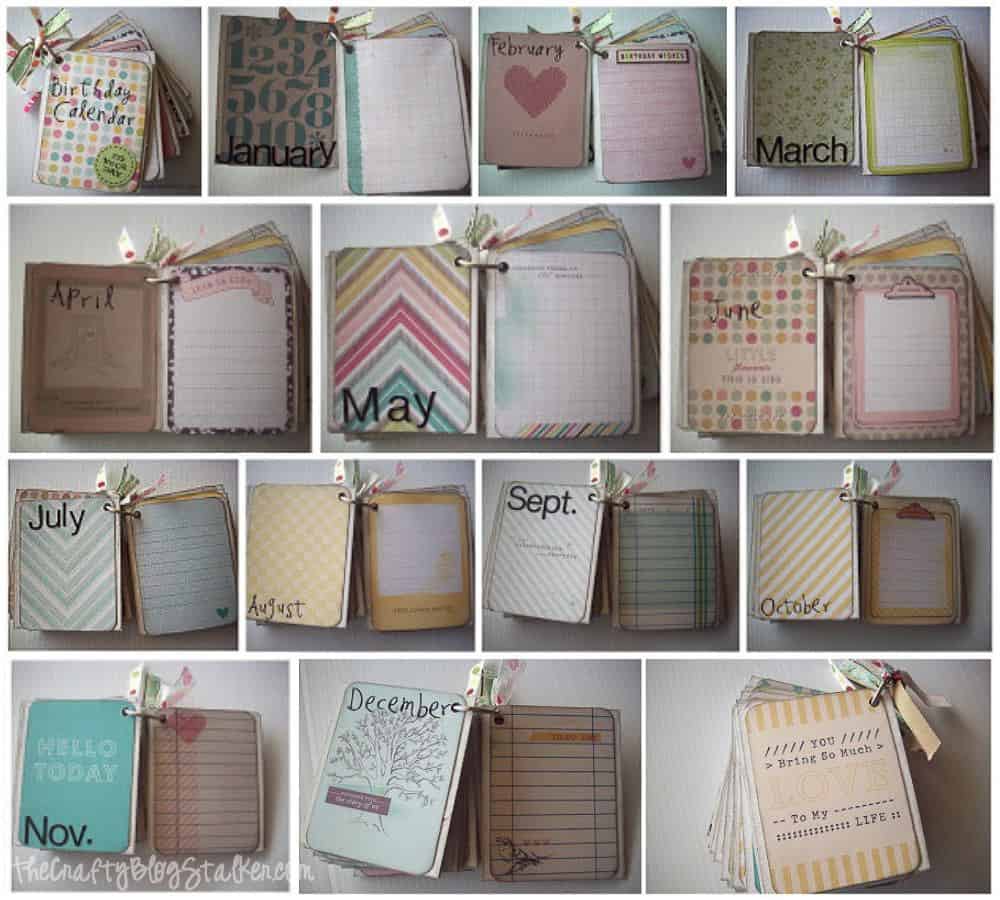
Isn't it cute??!!
This would make a great gift or you can keep it for yourself.
Now all you need to do is write in the birth dates for each month!
Our Crafting Essentials:
- The Cricut Cutting Machine is easily our favorite crafting tool. We use it in so many of our tutorials!
- These MakerX Crafting Tools are perfect for keeping in the craft room and are always ready when needed!
- This Fiskars Paper Trimmer is easy to use and cuts nicely without frayed edges.
- These Scotch Precision Scissors cut like a dream, and you get multiple pairs in a pack!

Tara
Such a cute project! I love the Core Kit!
Summer Scraps
Thanks so much Tara - it is such a fun kit!
Kenzie @ Chasing Happy
Oh my gosh, that's adorable! You. are. brilliant.
Kami
Absolutely adorable! I LOVE this. I think this would be a great Christmas present. Great idea.
A Proverbs 31 Wife
I love it! What a fun way to keep track of birthdays. 🙂
Stephanie
Oh my goodness. This is sooo adorable. I need to check out Project Life!
kaylynnczy
LOVE LOVE LOVE!!!
Courtney
Very cute idea!!
Angela Peters
Such a fun & adorable idea!!
Morgan - Modern Mommyhood
I love this idea and that all the cards/pretty designs are premade! I'm going to have to check Project Life out!
Jennifer
Such a fun and easy way to keep track of birthdays... which I kind of suck at... I'm good at remembering the date, really bad at remembering how old people are! Last year I sent my brother a happy 16th card... he turned 18. Worst sister ever! LOL
Summer Rumsey
Thanks Jennifer 🙂 I am not that great at remembering ages either. I am sure your brother still appreciated the thought 🙂
Karina Wetzel
What a fun idea :)!! I love that it comes as a kit for you to just put it together! Easy and simple! looks adorable too!
Summer Rumsey
Thanks for all of the nice comments everyone!
Mel@Mellywood's Mansion
That is really pretty and so handy I'm hopeless at remembering things, pinned it!
Helen
This is so pretty! I'm so bad at remembering birthdays so this is such a great idea!
Amy Desrosiers
This is such a pretty DIY-I could certainly use something like this!
Merissa
What a cute thing! It would be perfect for non-scrapbookers like me.
Jenny
oh the cuteness of it. i love it!! must make one 😀
Joanne
I really like your birthday calendar! It came out awesome!
Carmen Uballe
I saw this post on pinterest.. and I fell in love.. I am actually working on my own version of this now.. I love this so much...
FluffyMe
Oh My!! This is such a FABULOUS idea! I love the soft colors of the 5th & Frolic kit I really need to open and use mine now!
Malia
I like that a lot, very nice!
Ave T
I would like to try out this kit! Love how your calendar came out!
Alecia ChickenScratchNY
This is an amazing idea! I love that it hold so much info while still being really compact. I'm awful with dates so I really need something like this
Melanie
Ohh what a fun project and being a scrapbooker I totally can appreciate this... LOVE the cards, thanks for sharing
Julie
So cute, this would be a great gift if it doesn't turn out so cute I can't bear to part with it!
Summer Scraps
I made several - one fo me and a then some for gifts.
Gina
Very cute idea! So crafty... and functional! Thanks for sharing on the #ShareTheWealthSunday link up!
Akaleistar
That's such a cute calendar!
Joanita Theron
Hi
This is just awesome! Such a neat idea and it's so pretty too! Thank you so much for sharing at Snickerdoodle Sunday 🙂
Create With Joy
What a delightful project - thanks for sharing your creativity at Inspire Me Monday at Create With Joy!
Look forward to seeing what you've created this week! 🙂
Lorelai @ Life With Lorelai
Super cute! Love the layout and the multi-colored polka-dots. Thanks for sharing at the #HomeMattersParty - we love partying with you! Hope to see you next Friday. 🙂
~Lorelai
Life With Lorelai
angela @ Setting My Intention
I love this - it is so cute. You are one creative lady! #2usestuesday